Visual Studio Code is a very popular developer environment for building Alexa skills with Javascript. And we think it works even better with our Bespoken CLI – especially for debugging.
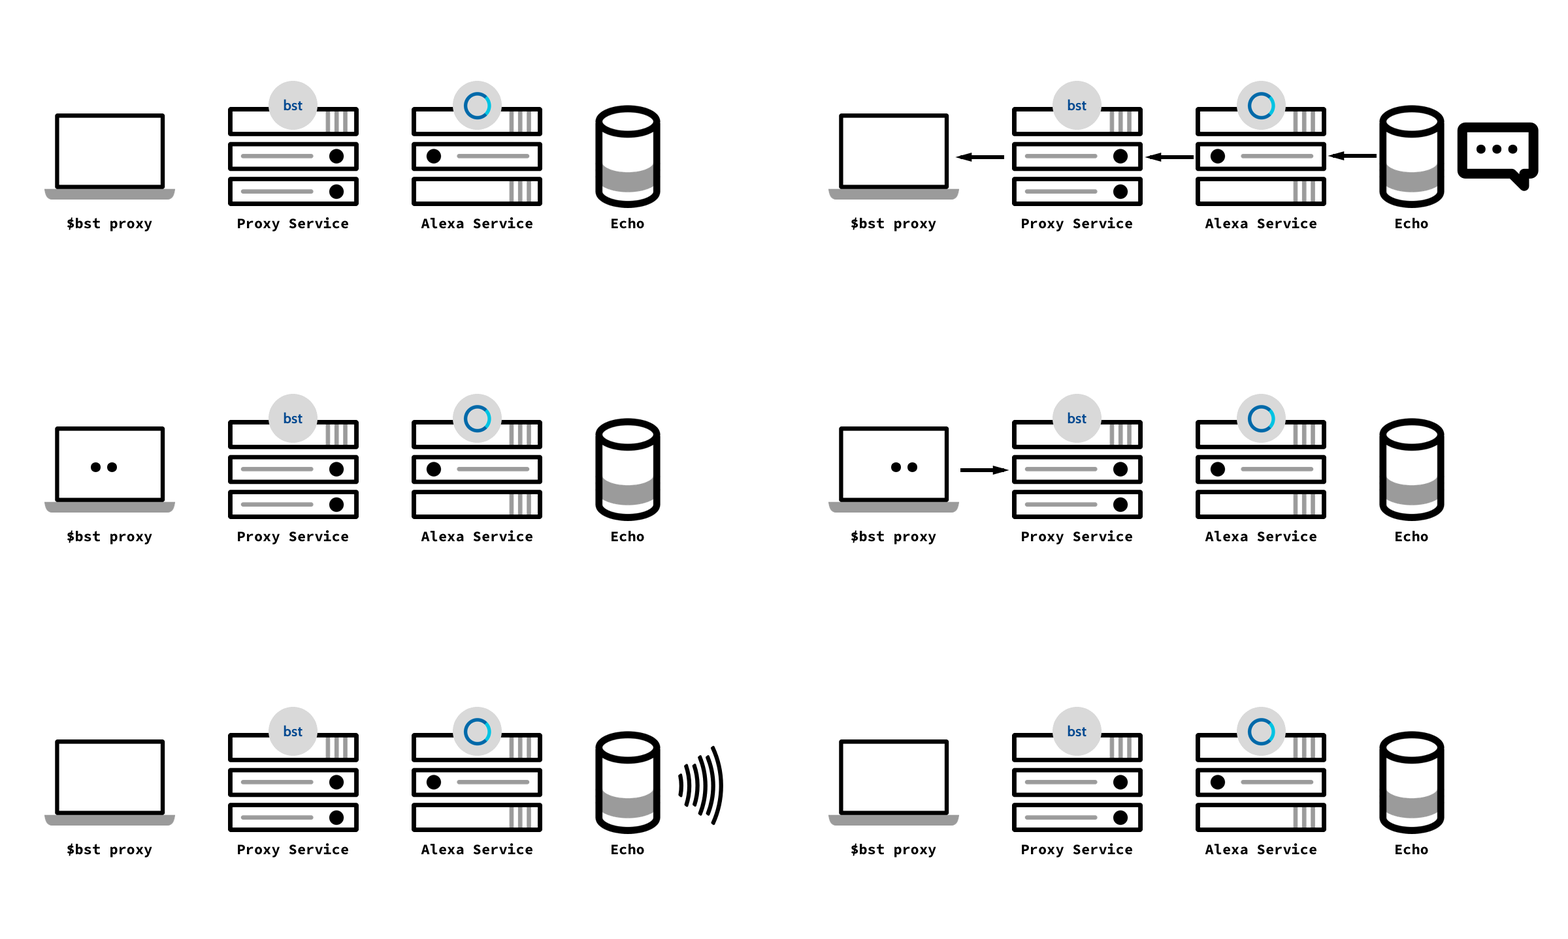
With it, you can easily step through an Alexa skill, using the REAL interactions coming from Alexa. A quick illustration on how our proxy works:

More information on how we deliver Alexa requests straight to your door, er, laptop here. 🙂
To step through an Alexa skill, first install bespoken-tools package as part of your project:
npm install bespoken-tools --save-dev
Next, add a launch configuration – access configurations via Debug -> Open Configurations. Create a configuration that looks like this:
| { | |
| "version": "0.2.0", | |
| "configurations": [ | |
| { | |
| "type": "node", | |
| "request": "launch", | |
| "name": "Launch Proxy", | |
| "program": "${workspaceRoot}/node_modules/bespoken-tools/bin/bst-proxy.js", | |
| "args": ["lambda", "src/index.js"], | |
| "cwd": "${workspaceRoot}" | |
| } | |
| ] | |
| } |
Make sure to put the relative path to your index.js in the args section.
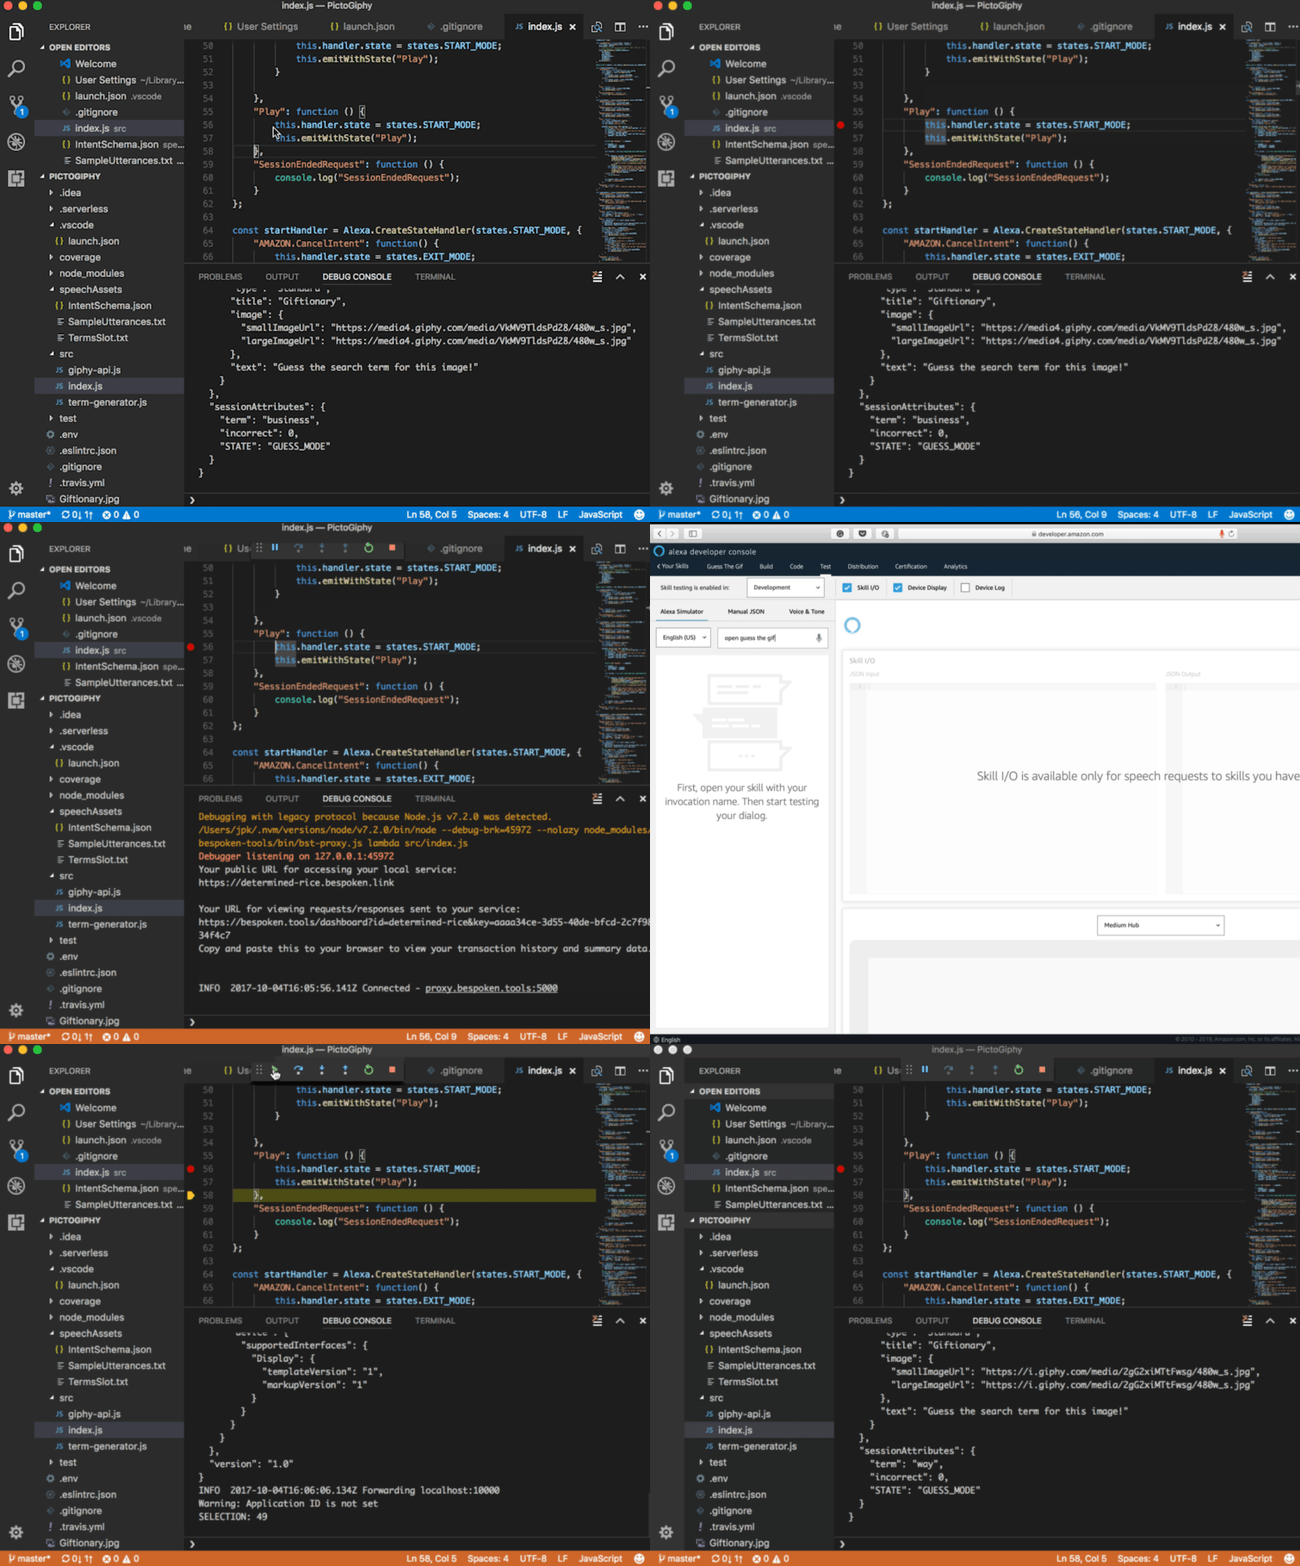
Now, we can try running it – select Debug -> Start Debugging. If everything is working correctly, you will see output like this:

Here we are adding a breakpoint and testing it with the service simulator:

Doesn’t that make things easier? Use this to pinpoint issues with REAL requests from Alexa in your skills!
And if VS Code is not your cup of tea, we also have a tutorial for WebStorm.
Hope that helps – please reach out to us in Slack or Gitter if you have any questions!


