
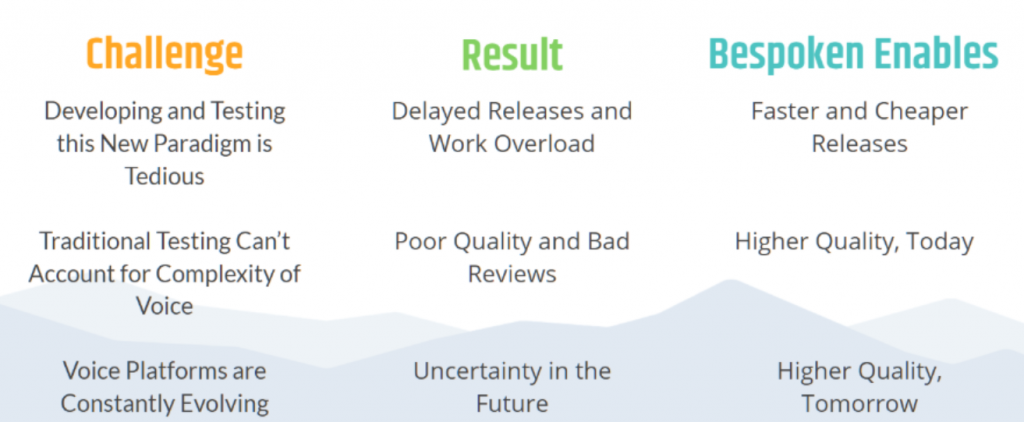
Are you facing any of the challenges below?
Let me show you simple and practical ways to get started with automated testing for voice.
No matter the stage of development you’re in, we have a solution that will meet your needs and ensure the quality of your voice apps.
This article can also help you to create a POC to demonstrate the benefits and cost savings associated with test automation for Google Actions.
Let’s begin!
Best Practices for Getting Started
Here are some tips to help you achieve your goals:
- Select a small but representative set of use cases to test your voice apps: Start small and grow. The first thing is to make sure you understand how to perform automated testing for your voice applications. For this, we are going to make a small introduction to each one of our tools. The goal is that you will be able to create a first and simple set of tests and learn how to execute them.
- Define the type of test to perform: This will depend on which stage you are at in your voice app’s development cycle. Once you have understood our tools you will be able to choose the most appropriate one for your needs. If you have already developed a voice app or are in the POC stage, we recommend you jump directly to End-to-end testing and Usability Performance Testing (UPT).
- Use Bespoken to start creating and executing test scripts: We’ll see this later, but remember that testing is very easy and the benefits are enormous, including cost savings, faster/cheaper releases, and reduction of bad reviews.
- Compile results and compare with manual testing: Once you have executed your automated tests with Bespoken, you will be able to immediately compare its benefits versus the execution of manual tests.
Preparation: Get and Install Bespoken CLI
As a prerequisite to start testing your voice app, you need to have Node.js installed on your computer. If you haven’t already, go here and install the appropriate version for your system. We recommend choosing the LTS version (with the installer).
Now it’s time to get and install the Bespoken CLI. To do that, open your command prompt and type:
$ npm install -g bespoken-tools
Note: If you are on MacOS and the command fails, it’s probably because you need to run it with sudo, like this:
$ sudo npm install -g bespoken-tools
Unit Testing your Google Action
You need to do unit testing to ensure that the individual pieces of your code are working correctly. To that end, you can write unit test scripts to verify each intent and each major piece of functionality. While it’s never too late to start Unit Testing, we recommend implementing it as early in your Voice Development Lifecycle as possible.
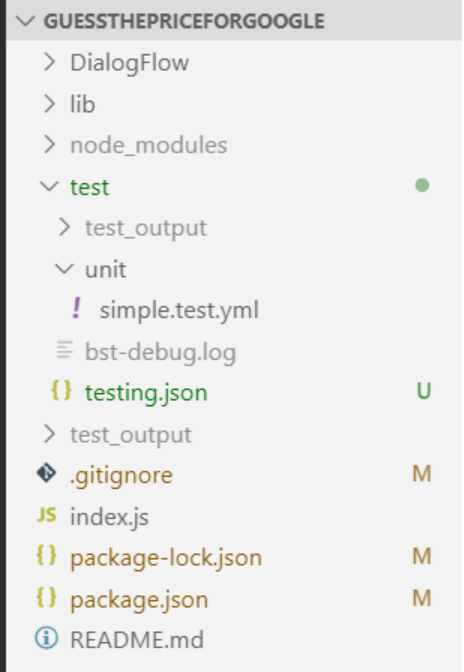
Folder Structure and Filename Conventions
Before you start creating unit test scripts, it’s important to know how to organize the files and results. This is our recommendation:
- Create a
testfolder under the root of your google action project. - Create a
unitfolder under yourtestdirectory to store your unit test script files and thetesting.jsonconfiguration file.
Here’s an example:
And for the naming conventions we suggest to follow the next structure:
[file-name].test.yml
File-name can equal the main module name (e.g. index) or you can also define it depending on the type of test you are performing (simple, advanced, 1stRelease, etc.)
A simple unit test script
Let’s start with a very simple yet complete unit test script:
| # A simple example of Google Actions test suite | |
| --- # Configuration YAML document | |
| configuration: | |
| locale: en-US | |
| --- # The --- indicates the start of a new test, which is a self-contained YAML document | |
| - test: "Works for one player" # Optional info about the test | |
| # This test shows how to access any parameter for a unit test directly | |
| - LaunchRequest: | |
| - payload.google.richResponse.items[0].simpleResponse.textToSpeech == Welcome to guess the price | |
| # For the simple Response thought just indicating the message right away works Since we have an internal alias | |
| - GetOnePlayer: tell us your name |
This test script is composed of two YAML documents, each one starting with three dashes (- – -). The first one represents a configuration section that will apply to the entire test script. In this example, we are only defining the locale for the test.
The second YAML document is a test case, defined by the first line after the three dashes with the reserved word test and a brief description of it. After the test line, we have a sequence of interactions, each one starting with a dash and a blank space (in YAML, spaces and tabs are important; learn more about the syntax here).
A typical interaction within a test script file is composed of two parts separated by a colon (:). The first part is an utterance. Since our unit tests are bypassing the voice platforms and just executing locally against your code, you can just use the name of the intent you want to invoke (e.g. LaunchRequest); during End-to-end Testing, which actually uses those voice platforms, you’d use the actual utterance instead (e.g. talk to my action).
After the colon, we have the expected result, which is what the voice app should respond with. The expected result can be simple, like just a phrase (Welcome to my action), or it can be more complex like a prompt with multiple valid responses or a card object.
How do the tests work? Easy! We send the utterances to the voice app and when we get the actual response we compare it to the expected result. If there is a match, the test will pass, otherwise, it will fail.
Notice that it is also possible to invoke an intent providing the slot values it requires, making it a one-shot utterance.
Now, let’s take a look at a more complex example:
| --- # Configuration YAML document | |
| configuration: | |
| locale: en-US | |
| --- # The --- indicates the start of a new test, which is a self-contained YAML document | |
| - test: "Works on multiplayer" # Optional info about the test | |
| - tags: FirstUse | |
| # This test shows how to access any parameter for a unit test directly | |
| - LaunchRequest: | |
| - payload.google.richResponse.items[0].simpleResponse.textToSpeech == Welcome to guess the price | |
| # For the simple Response thought just indicating the message right away works Since we have an internal alias | |
| - GetANumber number=2: contestant one please tell us, what is your name | |
| - GetContestantName playername=Juan: Contestant 2 | |
| - GetContestantName playername=Pedro: Juan * Guess the price | |
| - 100 dollars: Juan, * Your score for that answer is * Guess the price | |
| - GetANumber number=100: /.*you said 100*/i | |
| - GetANumber number=100: Juan, * Your score for that answer is * Guess the price | |
| - GetANumber number=100: Pedro, * Your score for that answer is * Guess the price | |
| - GetANumber number=100: Juan, * Your score for that answer is * Guess the price | |
| - GetANumber number=100: Game ended |
In this example, the tags reserved word allows you to define terms that will be evaluated at execution time, including or excluding test cases as defined in the testing.json configuration file (see the next section for more details).
As you can see, it is possible to use regular expressions (i.e. /.you said 100/i) and wildcards (*) in the expected response. Additionally, you can evaluate any element in the response payload, like the textToSpeech element.
The Unit testing.json Configuration File
This file is used to define the configuration options for unit testing your voice apps. It’s typically kept in the test/unit folder of your project. The file looks like this:
| { | |
| "dialogFlowDirectory": "./DialogFlow/GuessThePrice", | |
| "expressModule": "index.js", | |
| "expressPort": 3000, | |
| "platform": "google", | |
| "silent": true, | |
| "trace": false, | |
| "include": ["FirstUse"], | |
| "exclude": ["broken"] | |
| } |
Some things to highlight:
- The
dialogFlowDirectory,expressModule, andexpressPortkeys are used to set the location of the main module of your voice app, and the port being listened. - The
traceandsilentkeys are used for debugging purposes. If silent is set to false, console messages won’t be displayed. - The
includeandexcludeelements are used to define which test cases to execute at run time based on the tags added to the test scripts. You can also use the override properties when executing the test scripts as shown below:
$ bst test --include FirstUse,ReturningUser --exclude broken
Read here to learn all the configuration options for the testing.json file.
Running test scripts
To execute a unit test script, just open a terminal and navigate to the root folder, then use the test command like this:
$ bst test
You will see an output similar to the image below:

The results in red means that the test case failed. Based on this, we can either fix our test or fix the code.
The summary at the bottom tells us about the success of the tests, as well as basic code coverage info.
To see more detailed code coverage info, we can go to test_output/coverage/lcov-report/index.html. The test_output directory will be located in the same directory where you executed the test command.
It is important to mention that the environment variable UNIT_TEST is automatically set when running Unit Tests. This can be used to craft unit tests that run more predictably, like this:
| sessionAttributes.guessNumber = Math.floor(Math.random() * 100); | |
| // For testing purposes, force a number to be picked if the UNIT_TEST environment variable is set | |
| if (process.env.UNIT_TEST) { | |
| sessionAttributes.guessNumber = 50; | |
| } |
See here our Google Action sample and its unit test scripts to help you get started with them.
End-to-end testing your Google Actions
End-to-end tests focus on testing:
- The voice app as a whole (from Google through infrastructure to voice app).
- The utterance resolution aka speech recognition accuracy.
- The interaction models.
You need to do E2E testing because it’s critical to ensure your voice app behaves as expected once deployed on the assistant. Most Google Actions work with other services and use different pieces of technology, and so testing only your code (i.e. just doing Unit Testing) is no guarantee you are free from errors. Since users have shown their tolerance for errors in voice apps is far lower than with GUI apps, the best way you can increase retention and engagement is to catch these errors before your users do.
Just like with unit testing, we can create simple End-to-end test scripts to perform this type of functional testing.
Setup: Create a Virtual Device
First things first. To start testing your Google Action you have to create a Bespoken Virtual Device, which works like a real physical device (such as an Amazon Echo) but exists only as software. Follow the instructions described here to get your Virtual Device Token. You will later use this token to execute your test scripts.
Folder Structure and Filename Conventions
Similar to what we did for unit testing, we suggest creating a separate folder to store your End-to-end test scripts. This folder should have a different location than the unit test folder since regularly this type of test is often executed by a different team (QA). See our suggestions here.
An End-to-end Test Script
The next test script is a complete example that will help us to explain some of the most important features.
| --- | |
| configuration: | |
| locale: en-US | |
| voiceId: Matthew | |
| --- | |
| - test: Launch request, no further interaction | |
| - tags: NLUTest | |
| - <speak>talk to <phoneme alphabet="ipa" ph="gɛs ðə praɪs">guess the price</phoneme></speak>: welcome | |
| --- | |
| - test.only: Launch request followed by a sequence of interactions | |
| - talk to INVOCATION_NAME | |
| - one: | |
| - prompt: | |
| - please tell us your name | |
| - please tell us what is your name | |
| - jesus: let's start the game jesus your product is * guess the price | |
| - two hundred: You said 200 the actual price was * your score for that answer is * points *your next product is * guess the price | |
| - stop: | |
| - prompt: | |
| - Goodbye # This is how to test multiple valid responses | |
| - okay I'll leave you be | |
| - okay I'll go brainstorm more ways to help you | |
| - sure I'll stop | |
| - /^$/ # This regex is equivalent to empty response or prompt = "" |
- The first YAML document configures the execution of the test. In this case, we are just defining the locale and the Amazon Polly voice ID to use. In End-to-end testing, we convert the utterances you provide to speech using Amazon Polly or Google Text-to-Speech, capture the actual audio from the voice platform, convert them back to text, and compare them with the expected results defined in the test script. Read here to know the extra configuration settings that can be added to the
testing.json. - The second YAML document is a test case. It contains a tag which can be later used to exclude or include test cases during run time. In this example, we are also sending as an utterance an SSML expression using a phonetic dictionary. This is very helpful when you have an utterance that may be difficult for the voice platform to pronounce by default. Alternatively, we could have just included:
talk to guess the price: welcome
- The third test case is using the instruction
.only, which means that it will run only this case when the entire script is executed. We are also using a find/replace term,INVOCATION_NAME, to invoke the app; this parameter is defined in thetesting.jsonfile below. Finally, notice how it is also possible to use wildcards and regular expressions in the expected results part of the tests.
The End-to-end testing.json configuration file
The configuration file for End-to-end testing is similar to the one we have seen in the previous section for unit testing. There are many available properties that we can use; let’s look at an example:
| { | |
| "type":"e2e", | |
| "findReplace":{ | |
| "INVOCATION_NAME":"guess the price", | |
| "INVOCATION_NAME_DEV":"guess the price development" | |
| }, | |
| "homophones":{ | |
| "is":[ | |
| "as", | |
| "does", | |
| "it's" | |
| ], | |
| "two":[ | |
| "to", | |
| "2" | |
| ], | |
| "contestant":[ | |
| "contested" | |
| ] | |
| }, | |
| "trace":false, | |
| "jest":{ | |
| "reporters":[ | |
| "default", | |
| [ | |
| "./node_modules/jest-html-reporter", | |
| { | |
| "includeFailureMsg":true, | |
| "pageTitle":"Bespoken Test Report" | |
| } | |
| ] | |
| ], | |
| "silent":false, | |
| "testMatch":[ | |
| "**/test/*.yml", | |
| "**/tests/*.yml", | |
| "**/*.e2e.yml" | |
| ] | |
| }, | |
| "virtualDeviceToken":{ | |
| "alexa":{ | |
| "en-US":"alexa-xxxx-xxxx-xxxx-xxxx-xxxx" | |
| }, | |
| "google":{ | |
| "en-US":"google-xxxx-xxxx-xxxx-xxxx-xxxx" | |
| } | |
| } | |
| } |
- The
findReplacekey is used to set parameters in the test scripts. As we have seen in the End-to-end example we can use it to define parameters likeINVOCATION_NAMEthat later can be translated into different text. - Use homophones to fix issues with the speech-to-text during test execution. Remember the speech-to-text is performed on the audio coming FROM Google. Homophones are defined in the
homophonessection of the testing.json file. The left side (e.g.contestant) will be used when any of the values on the right side (e.g., “contested”) are returned in the transcript. Read more about homophones here. - The
virtualDeviceTokenelement is used to add the virtual devices we are going to use in our tests. You will need one virtual device per each locale (e.g. en-US, fr-FR, etc.) and per each platform (e.g. Alexa or Google) that you want to test.
Advanced Topics
- Check this example where just one test script is used to End-to-end test an app deployed on both Alexa and Google.
More testing tools
- Usability Performance Testing (UPT): This tool allows you to send hundreds or thousands of utterances to your voice app to verify how the ASR and NLU are working. The first run of UPT is used to get a score (% of successfully understood utterances/slots) that will serve as a baseline for future executions. After each execution, we can help you analyze the results and make suggestions about how to improve your interaction model. We have seen improvements of more than 80% in the speech recognition before launching! Check out this case study to learn more.
- Monitoring: Once you are sure your app understood your users, and have launched with confidence, it is important to keep an eye on it. Your code might be unbreakable, but what if your voice service releases an update that makes your voice app stop performing as expected? How would you know? We have created monitoring for exactly these types of scenarios, giving you peace of mind by alerting you when your voice app stops working. Be the first to know and avoid bad reviews. Read here to learn how to get started.
- IVR Testing: Do you have an IVR with deep levels of interactions? Are you lost within the functional branches and uncountable paths your users can take? We can help to automate tests for your IVR. Define all the interactions you want and run them hundreds of times if you wish. Contact us for a demo.
I hope this guide has been helpful to you. If you need more help, don’t hesitate to contact us for a demo to show you how easy, quick, and affordable it is to start testing your voice portfolio with our tools.